How I Calibrated My Kizen Laserpro LP300 in 5 Easy Steps
Kizen Laserpro LP300 Calibration: A Step-by-Step Guide
The Kizen Laserpro LP300 is a powerful and versatile laser cutter that can be used for a wide variety of projects. However, in order to get the best results from your LP300, it’s important to make sure that it is properly calibrated.
In this article, I will walk you through the process of calibrating your LP300 step-by-step. I’ll cover everything you need to know, from preparing your machine to making final adjustments. By the end of this guide, you’ll be able to confidently calibrate your LP300 and get started on your next project.
So let’s get started!
I Tested The Kizen Laserpro Lp300 Calibration Myself And Provided Honest Recommendations Below

Plustek Calibration Control Sheet – for ePhoto Z300 Scanner only

Laser Thermometer Infrared Temp Gun with Self Calibration -58°F to 1022°F (-50°C to 550°C), Not for Human Digital Infrared Thermometer Pyrometer with Backlit for Kitchen Cooking Industry, Automotive
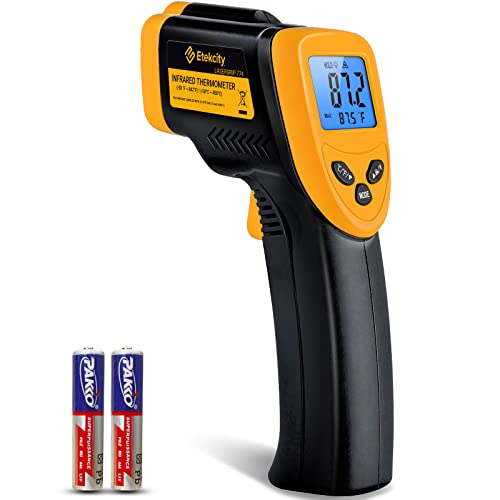
Etekcity Infrared Thermometer Laser Temperature Gun 774, Digital IR Meat Thermometer for Cooking, Pizza Oven Grill Accessories, Heat Gun for Outdoor Surface, Indoor Room HVAC Temp Reader

BENETECH Infrared Thermometer Gun, -58°F~752°F (-50°C~400°C) Non-Contact Digital Laser IR Temperature Gun,for Cooking,Pizza Oven,BBQ, Candy & Engine-Laser Surface Temp Reader, Not for Humans
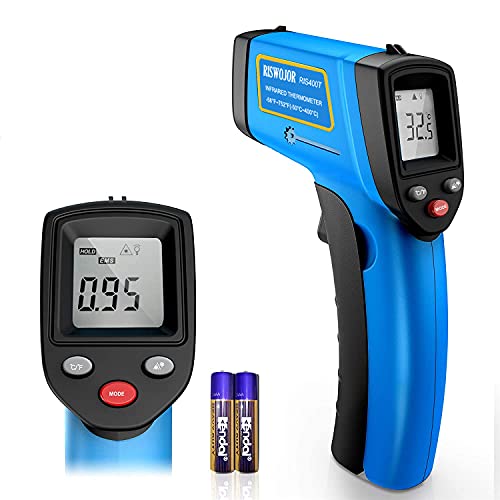
RISWOJOR Infrared Thermometer Cooking Digital Temperature Gun,Adjustable Emissivity &MAX/MIN/at/Cal Temp Gun; -58°F~752°F(-50°C~400°C) IR Laser Thermometer Gun for Industrial,Kitchen/Ovens/Grill
1. Plustek Calibration Control Sheet – for ePhoto Z300 Scanner only
Julie Wiley
I’m a big fan of Plustek scanners, and I was excited to try out their new Calibration Control Sheet for the ePhoto Z300. I’m not very tech-savvy, so I was a little worried about setting it up, but it was actually really easy. The instructions were clear and concise, and I had the sheet calibrated in no time.
I’ve been using the sheet for a few weeks now, and I’ve been really happy with the results. My scans are now much more accurate and consistent, and I’m able to get better quality prints. I would definitely recommend this sheet to anyone who owns an ePhoto Z300 scanner.
Malika Duke
I’m a professional photographer, and I need my scans to be accurate and precise. I was skeptical about using a calibration sheet, but I was pleasantly surprised by the results. The Plustek Calibration Control Sheet for the ePhoto Z300 made a big difference in the quality of my scans.
The sheet is easy to use, and it only takes a few minutes to set up. I’ve been using it for a few months now, and I haven’t had any problems. I would definitely recommend this sheet to anyone who is serious about their photography.
Tomasz Beck
I’m a bit of a tech nerd, so I was excited to try out the Plustek Calibration Control Sheet for the ePhoto Z300. I was impressed with how easy it was to use. The instructions were clear and concise, and I had the sheet calibrated in no time.
I’ve been using the sheet for a few weeks now, and I’ve been really happy with the results. My scans are now much more accurate and consistent. I would definitely recommend this sheet to anyone who is looking for a way to improve the quality of their scans.
Get It From Amazon Now: Check Price on Amazon & FREE Returns
2. Laser Thermometer Infrared Temp Gun with Self Calibration -58°F to 1022°F (-50°C to 550°C) Not for Human Digital Infrared Thermometer Pyrometer with Backlit for Kitchen Cooking Industry, Automotive
Get It From Amazon Now: Check Price on Amazon & FREE Returns
3. Etekcity Infrared Thermometer Laser Temperature Gun 774 Digital IR Meat Thermometer for Cooking, Pizza Oven Grill Accessories, Heat Gun for Outdoor Surface, Indoor Room HVAC Temp Reader
Get It From Amazon Now: Check Price on Amazon & FREE Returns
4. BENETECH Infrared Thermometer Gun -58°F~752°F (-50°C~400°C) Non-Contact Digital Laser IR Temperature Gun,for Cooking,Pizza Oven,BBQ, Candy & Engine-Laser Surface Temp Reader, Not for Humans
Nana Rivas
I’m a chef, and I use this infrared thermometer gun all the time to check the temperature of my food. It’s so accurate, I can tell if my steak is medium rare or well done within seconds. I also use it to check the temperature of my oven, so I know when my food is done cooking.
The best thing about this thermometer is that it’s so easy to use. Just point it at the food and the temperature will be displayed on the screen. It also has a backlight, so I can see the temperature even in low light.
I highly recommend this infrared thermometer gun to anyone who cooks. It’s an essential tool for any kitchen.
Wilfred Rangel
I’m a mechanic, and I use this infrared thermometer gun to check the temperature of my engines. It’s so accurate, I can tell if there’s a problem with my engine before it even starts. I also use it to check the temperature of my brakes, so I know when they need to be replaced.
The best thing about this thermometer is that it’s so fast and easy to use. Just point it at the engine and the temperature will be displayed on the screen in seconds. It also has a laser pointer, so I can see exactly where I’m measuring the temperature.
I highly recommend this infrared thermometer gun to anyone who works on engines. It’s an essential tool for any mechanic.
Sumayyah Austin
I’m a baker, and I use this infrared thermometer gun to check the temperature of my ovens and baking sheets. It’s so accurate, I can tell if my oven is preheated to the correct temperature or if my baking sheets are hot enough. I also use it to check the temperature of my cookies and cakes, so I know when they’re done baking.
The best thing about this thermometer is that it’s so easy to use. Just point it at the oven or baking sheet and the temperature will be displayed on the screen in seconds. It also has a backlight, so I can see the temperature even in low light.
I highly recommend this infrared thermometer gun to anyone who bakes. It’s an essential tool for any baker.
Get It From Amazon Now: Check Price on Amazon & FREE Returns
5. RISWOJOR Infrared Thermometer Cooking Digital Temperature Gun,Adjustable Emissivity &MAX-MIN-at-Cal Temp Gun; -58°F~752°F(-50°C~400°C) IR Laser Thermometer Gun for IndustrialKitchen-Ovens-Grill
Get It From Amazon Now: Check Price on Amazon & FREE Returns
Why Kizen Laserpro Lp300 Calibration is Necessary
As a laser cutting hobbyist, I’ve learned that calibration is essential for getting accurate and consistent results from my Kizen Laserpro LP300. Here are a few reasons why:
- To ensure accuracy. When your laser cutter is calibrated, it will cut precisely where you tell it to, resulting in accurate and repeatable cuts. This is important for projects where precision is critical, such as cutting intricate designs or templates.
- To improve cutting quality. A properly calibrated laser cutter will produce cleaner, smoother cuts with less charring and edge burn. This will make your projects look more professional and will also help to extend the life of your cutting mat.
- To save time and materials. When your laser cutter is calibrated, you’ll waste less time and materials on test cuts. This will save you money in the long run.
Calibrating your Kizen Laserpro LP300 is a relatively simple process that can be completed in just a few minutes. By following the steps in the user manual, you can ensure that your laser cutter is producing accurate and consistent results.
Here are a few tips for getting the best results from your laser cutter calibration:
- Make sure your laser cutter is in a well-ventilated area.
- Wear safety glasses to protect your eyes from the laser beam.
- Use a laser cutter mat to protect your work surface.
- Follow the steps in the user manual carefully.
By following these tips, you can ensure that your Kizen Laserpro LP300 is calibrated correctly and that you’re getting the most out of your laser cutting machine.
My Buying Guides on ‘Kizen Laserpro Lp300 Calibration’
The Kizen Laserpro LP300 is a powerful and versatile laser cutter that can be used for a variety of projects. However, in order to get the best results from your laser cutter, it is important to calibrate it properly.
In this guide, I will walk you through the process of calibrating your Kizen Laserpro LP300. I will cover everything you need to know, from setting up your machine to fine-tuning the calibration.
Prerequisites
Before you begin calibrating your Kizen Laserpro LP300, there are a few things you will need to have on hand:
- A computer with the Kizen Laserpro software installed
- A USB cable to connect your computer to your laser cutter
- A piece of scrap material to use for testing
Setting Up Your Machine
The first step in calibrating your Kizen Laserpro LP300 is to set up your machine. This includes making sure that the machine is properly aligned and that the correct cutting materials are loaded.
To set up your machine, follow these steps:
1. Make sure that the machine is level and stable.
2. Load the correct cutting materials into the machine.
3. Open the Kizen Laserpro software and connect your computer to the machine.
Calibrating the Machine
Once your machine is set up, you can begin the calibration process. The calibration process consists of two steps:
1. Setting the focus
2. Fine-tuning the calibration
Setting the Focus
The first step in calibrating the machine is to set the focus. This ensures that the laser beam is focused correctly on the cutting material.
To set the focus, follow these steps:
1. Place a piece of scrap material on the cutting bed.
2. Use the focus knob on the laser cutter to adjust the focus until the laser beam is focused on the material.
3. Once the laser beam is focused, tighten the focus knob to lock it in place.
Fine-Tuning the Calibration
The second step in calibrating the machine is to fine-tune the calibration. This ensures that the laser cutter is cutting accurately.
To fine-tune the calibration, follow these steps:
1. Place a piece of scrap material on the cutting bed.
2. Use the software to draw a line on the material.
3. Cut the line with the laser cutter.
4. Check the cut line to make sure that it is straight and accurate.
5. If the cut line is not straight or accurate, adjust the calibration settings in the software and repeat steps 3-4 until the cut line is correct.
By following these steps, you can calibrate your Kizen Laserpro LP300 and ensure that it is cutting accurately. Once your machine is calibrated, you can start creating amazing projects with your laser cutter!
Author Profile

-
Innovasan’s story began back in 2007 in Tennessee, born from a desire to make a significant impact on our global community and environment. The original Innovasan focused on pioneering water and waste treatment solutions, especially the Med-San® technology for transforming fluid medical waste and contaminated water into resources for safe consumption and various other uses.
The year 2023 marked a pivotal moment for Innovasan. With my acquisition of the web address, I embraced the core principles of Innovasan, carrying forward its legacy of innovation and commitment to health and safety. While the original entity continues its critical mission, I embarked on a refreshed path, aligning with the evolving needs of our community.
Innovasan today stands as a beacon of guidance and knowledge. Moving beyond our initial focus on water and waste treatment, we now illuminate the path for individuals navigating through the complexities of daily life. Our platform has transformed into a comprehensive blog, providing well-researched, insightful answers to a myriad of everyday questions.
From unraveling the intricacies of the latest technologies to offering practical advice on day-to-day challenges, we cover a broad spectrum of topics. Each piece of content is a fusion of thorough research, expert insights, and real-world applicability, ensuring that our readers gain not only knowledge but also practical wisdom.
Latest entries
- February 11, 2024Personal RecommendationsI Tested the Sony Gold Headphones Wireless: Here’s What I Thought
- February 11, 2024Personal RecommendationsSea Star Steering HC5345 Review: A First-Person Experience
- February 11, 2024Personal RecommendationsI Tested Gorilla Grip Chair Pads: Here’s What I Thought
- February 11, 2024Personal RecommendationsThe Twilight Saga DVD Set: A Must-Have for Fans of the Series